Speed Up Minecraft with Land Generator
Prepopulating Your Minecraft World for Enhanced Performance
As you venture through your Minecraft world, the game dynamically generates terrain in real-time. This process, however, can be resource-intensive.
A significant portion of your computer’s processing power is dedicated to creating the environment around your character.
How Pre-Generation Improves Gameplay
By generating world chunks in advance, the demand on your CPU during gameplay is substantially reduced. This proactive approach results in a more fluid and responsive gaming experience.
Prepopulating your map minimizes instances of lag and stuttering, allowing for smoother exploration and building.
Benefits of World Pre-Generation
- Reduced CPU Load: Less real-time generation means more processing power available for other tasks.
- Smoother Gameplay: Experience fewer interruptions and a more consistent frame rate.
- Minimized Lag: Pre-generation proactively addresses potential performance bottlenecks.
Essentially, preparing your world map beforehand optimizes performance and delivers a speedier, more enjoyable Minecraft session.
Following the steps to prepopulate your world will allow for a more seamless and immersive experience.
Understanding the Benefits of Pre-Generating Minecraft Worlds
Minecraft, despite its visually simple appearance with low-resolution textures and blocky designs, demands significant system resources. Complex calculations and rendering processes are continuously performed to create and display the expansive world map and manage all entities and their associated physics.
This is particularly demanding on the CPU. Players experiencing rapid chunk loading, even on powerful machines, may encounter stuttering and lag, especially in creative mode. Older systems often struggle significantly, with frame rates plummeting to extremely low levels.
Such lag during chunk rendering disrupts immersion and can render the game unplayable. However, a solution exists to mitigate this waiting period. The generation of new chunks can be offloaded, effectively performing the intensive work during periods of inactivity.
This is achieved through a dedicated program known as Minecraft Land Generator. Utilizing this tool offers substantial advantages with minimal drawbacks, making it a highly recommended practice for all players.
How Minecraft Land Generator Works
The core principle behind Minecraft Land Generator is to pre-populate world chunks in the background. Instead of the game generating terrain in real-time as you explore, the program handles this task beforehand.
This proactive approach means that when you enter a new area, the chunks are already rendered and ready to display, eliminating the lag associated with on-the-fly generation. The result is a smoother, more responsive gaming experience.
- Reduced Lag: Eliminates stuttering and frame rate drops during exploration.
- Improved Immersion: Allows for uninterrupted gameplay and a more engaging experience.
- Background Processing: Chunk generation occurs while you are not actively playing.
Essentially, Minecraft Land Generator transforms the resource-intensive task of world generation into a background process, freeing up your system's resources for a more fluid and enjoyable Minecraft experience.
Understanding the Mechanics of Minecraft Land Generator
The operational principle of the Minecraft Land Generator is straightforward upon analysis. This application functions as an aid, simulating player exploration across a world map when used in conjunction with a compatible Minecraft server file.
Manually surveying a 20,000 x 20,000 square grid within the game would be exceptionally time-consuming for a player, potentially requiring days of continuous gameplay. However, the Minecraft Land Generator can accomplish the same task in a mere hour or two on modern hardware.
Even older computers can complete the process overnight. Importantly, the initial run, whether it takes an hour or twelve, is a one-time effort. Subsequent map expansions, such as increasing the world size from 10,000 to 20,000 blocks per side, are the only instances requiring another execution.
A notable aspect of using Minecraft Land Generator is the resulting increase in world file size. While a Minecraft map is conceptually complete upon creation—defined by the world seed and generation algorithm—it doesn't consume significant hard drive space until the player visits and generates each chunk.
Consequently, a newly created, largely unexplored map typically occupies around 10MB or less. However, the file size grows as the player explores and the data for each chunk is written. A map containing 5,000 x 5,000 blocks of chunks will typically reach approximately 600MB in size.
Larger maps naturally have larger file sizes, increasing exponentially. A 20,000 by 20,000 map can result in a game file exceeding 6GB. This represents the primary trade-off associated with the Minecraft Land Generator.
The benefits of reduced load times and improved gameplay are exchanged for increased disk space usage. Considering the performance impact of chunk generation on both single-player games (particularly on less powerful systems) and servers—where multiple players can simultaneously generate chunks—this trade-off is often worthwhile, especially for server administrators.
Leveraging the Minecraft Land Generator
The Minecraft Land Generator, or MLG as it will be referred to for conciseness, functions optimally with correct setup. However, achieving this proper configuration can present some initial challenges.
This guide will detail both the installation and configuration procedures, aiming to provide a seamless experience for users.
Installation of MLG
Before utilizing the generator, installation is a necessary first step. Download the MLG software from a reputable source, ensuring compatibility with your Minecraft version.
Following the download, extract the files to your Minecraft mods folder. This folder is typically located within your Minecraft installation directory.
Configuring MLG for Optimal Results
Once installed, configuration is key to tailoring the land generation to your preferences. Access the MLG configuration file, usually a text-based document within the MLG folder.
Within this file, numerous parameters can be adjusted. These include the size of continents, the height of mountains, and the frequency of various terrain features.
Understanding Key Configuration Options
Several settings deserve particular attention during configuration. The 'continent size' parameter dictates the overall scale of landmasses created.
Adjusting the 'mountain height' setting allows control over the elevation of mountainous regions. Furthermore, the 'terrain feature frequency' influences how often features like forests and rivers appear.
Troubleshooting Common Issues
If issues arise, verifying the installation is the first step. Ensure the MLG files are correctly placed within the mods folder.
Configuration errors are also a frequent cause of problems. Double-check all parameter values for accuracy and compatibility.
Consult the MLG documentation or online forums for solutions to more complex issues. The community often provides valuable assistance.
Finalizing Your MLG Setup
After installation and configuration, launch Minecraft and create a new world. Select the MLG world type to begin generating landscapes using your customized settings.
Experiment with different configurations to discover the ideal balance of terrain features for your desired gameplay experience. MLG offers a high degree of customization.
Acquiring the Minecraft Land Generator
The necessary files for the Minecraft Land Generator are available on Github. However, the process of accessing these files can be somewhat opaque for those not accustomed to the platform. To obtain the latest version of MLG, proceed to the project’s zip archive section located here.
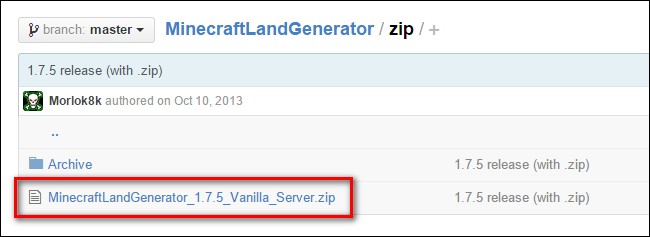
Choose the link labeled MinecraftLandGenerator_X.X.X_Vanilla_Server.zip. (Currently, version 1.7.5 is the available file as of this guide.) Despite the apparent age of the file – version 1.7.5 dates back to October 2013 – it will automatically update. This update process will be covered shortly.

Navigate to the zip file’s dedicated subpage. Then, select the "Raw" button, as illustrated in the image above. The file should then be saved to your computer.
Installing and Updating Minecraft Land Generator
Following the download of the zip archive, the contents should be extracted. We recommend storing all Minecraft editing tools within a dedicated "Minecraft archives" directory, such as \Minecraft\Editing Tools\, though the extracted "MinecraftLandGenerator" tool can be placed in any desired location. The application and its supporting files are entirely self-contained.
Navigate into the folder and locate the setup file tailored to your specific operating system.
MLG provides setup files for Windows, Mac, and Linux, clearly labeled as "MLG_Initial_Setup_OS.EXT," where the operating system and file extension are explicitly indicated. Windows users should execute "MLG_Initial_Setup_Windows.cmd," and similarly for other operating systems. Allow the script to complete its execution. Upon completion of the initial setup, the MLG folder will contain a significantly larger number of files, and MLG will be brought up to date (version 1.7.6 at the time of this guide).
However, a manual update step is still necessary. While MLG is designed to download the Minecraft server file directly from Minecraft servers during the update process, this functionality is currently impaired. This is due to changes implemented by Mojang in their file naming conventions, meaning "minecraft_server.jar" no longer consistently points to the latest release.
Consequently, the updater consistently retrieves Minecraft Server version 1.5.2, which is considerably outdated.
The most recent Minecraft server file (minecraft_server.1.8.1.jar as of this tutorial) can be obtained from the official Minecraft website. Alternatively, older server.jar versions are available through a well-maintained table provided by MCVersions.net. But why would you need older versions?
Ensuring the correct server version is the most crucial step. The version number of the server.jar file must precisely correspond to the Minecraft version used to play the world map. For instance, if you intend to expand a map originating from Minecraft 1.6.4, utilizing the Minecraft 1.8.1 server with MLG is not advisable. The substantial changes in chunk generation algorithms and game content between 1.6.4 and 1.8.* could lead to crashes or the generation of undesirable errors and artifacts on your map.
Related: How to Run a Simple Local Minecraft Server (With and Without Mods)
To reiterate, matching the Minecraft server version to your game version is paramount.
This principle holds true universally. If you are employing a modified server.jar file with installed game modifications, it is that specific server.jar file that must be provided to MLG. Regardless of the situation – whether using a vanilla server, a modded server, a new server, or an older server – the server.jar file must align perfectly with the map.
After acquiring the appropriate server.jar file, whether by downloading it for single-player maps or copying it from a home server setup, delete the existing minecraft_server.jar file located in the root directory of the MLG folder. Then, replace it with the correct server file, renaming it to minecraft_server.jar if required.
Throughout our testing of MLG, all encountered issues stemmed directly from a mismatch between the map being worked on and the corresponding server.jar file.
Utilizing Minecraft Land Generator
After completing the initial setup, ensuring the correct server.jar file is used for your map is paramount. The subsequent steps are straightforward. You will be presented with two primary options. The first concerns whether to create a completely new map or augment an existing one. The second relates to the desired size of the generated area, bearing in mind that map size increases exponentially; a 5000 x 5000 block map requires approximately 600MB, while a 20,000 x 20,000 block map demands around 6GB.
Creating a New Minecraft World
While many users will focus on expanding maps they’ve already begun to explore, generating a new map is covered first due to its minimal setup requirements. This is also a viable option for those aiming to generate an entire server map in a single operation.
The server.jar file will utilize the server.properties file, located within the MLG folder, during world generation. This file contains default Minecraft settings, and modifications are generally unnecessary unless specific needs dictate otherwise. For a comprehensive understanding of the server.properties file, refer to this Minecraft wiki entry. If you currently operate a server, particularly a modded one with customized server.properties entries, copy your existing server.properties file alongside your server.jar file.
To generate a new world using your current server.jar, execute the Run_MLG_Windows.cmd (or the corresponding file for your operating system). You will then be prompted to input the map dimensions.
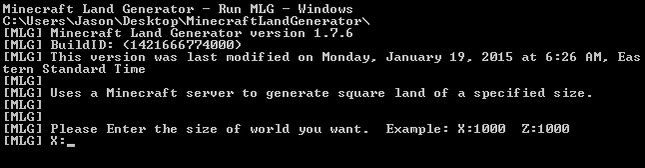
For illustrative purposes, we will demonstrate using non-equal length sides, creating a rectangular map. In practice, a square map is often preferred. We will initiate the map generation process with the input X: 8,000 Z: 5,000.
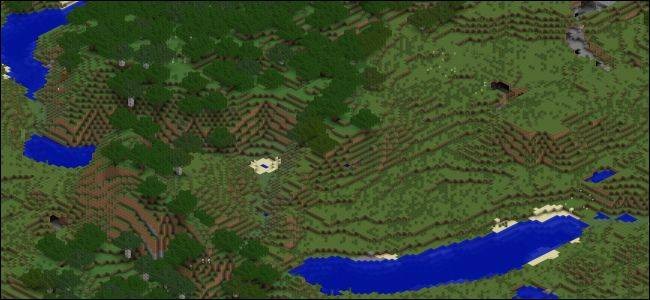
Employing the versatile Mapcrafter tool, which generates a Google Maps-style representation of your Minecraft map, we can visualize the map even before loading it within the game itself (see this tutorial for information on using Mapcrafter).
Upon completion, copy the generated /world/ folder and its contents to your Minecraft /saves/ folder, or the appropriate server location. Launch the game or server as usual to enjoy your pregenerated map.
Expanding an Existing Minecraft Map
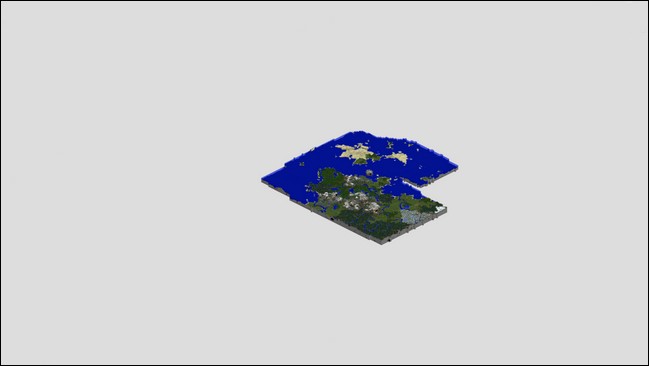
MLG excels at both expanding and filling existing maps. If you’ve explored approximately 5,000 blocks from the spawn point, and wish to expand the map to 10,000 x 10,000 blocks, MLG will extend the map's borders and fill any gaps within the explored area, ensuring a continuous, seamless map.
Consider this example map, a small world visualized using Mapcrafter.
To extend or fill an existing map, copy the contents of your world save file into the MLG directory. For instance, if your map is named "Super Awesome World" and located in your Minecraft /saves/ directory at /Super Awesome World/, copy the entire directory.
Then, rename the copied folder to /world/ within the MLG directory.
Run the Run_MLG_Windows.cmd (or equivalent). The primary difference in output, compared to generating a new world, is that the application will announce the creation of a new world when none exists. With a valid /world/ directory present, it will load and immediately begin expansion.
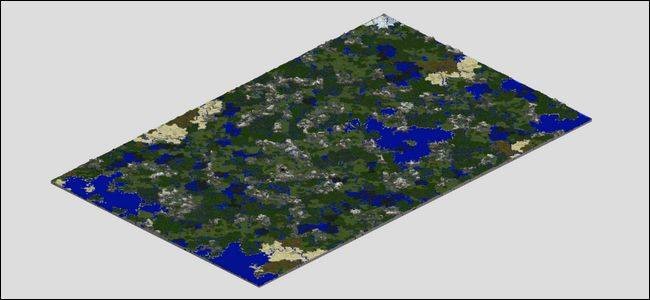
Let's expand the small world shown above to a 5,000 x 5,000 block world. After the process finishes, we can revisit Mapcrafter. The scale remains consistent, allowing you to observe the newly generated chunks and how MLG filled the gaps.
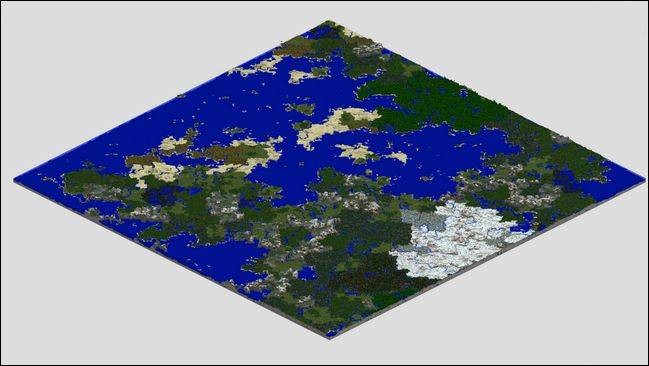
The result is a beautifully seamless, edge-to-edge chunk generation, devoid of any block gaps.
Consequently, in-game chunk generation will be significantly reduced. Beyond pregenerating your map with Minecraft Land Generator, numerous tweaks – from adjusting video settings to installing performance-enhancing mods – can optimize Minecraft’s performance on older computers.
Do you have a specific Minecraft question or a tutorial request? Send us an email at [email protected], and we will endeavor to assist you.
Related Posts

Connect Xbox 360 Wireless Controller to PC - Easy Guide

Wearing Glasses with Oculus Rift & HTC Vive - Is it Possible?

Use PS4 DualShock 4 Controller on Mac - Setup & Guide
Play Xbox 360 Games on Xbox One - Compatibility Guide

Cloud Gaming: Is It the Future of Gaming?